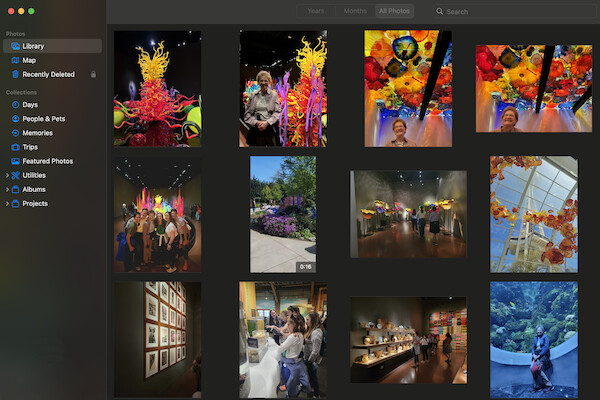
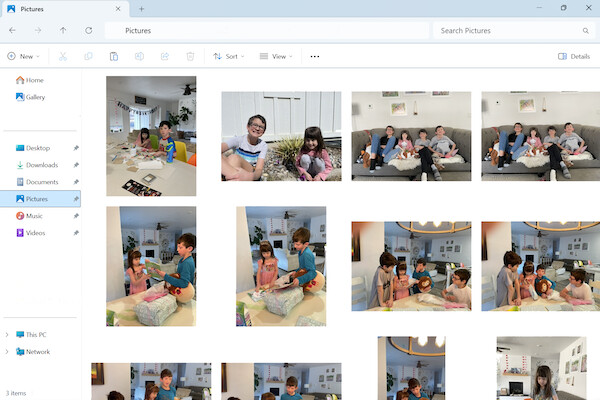
So you have thousands of photos that you don’t know what to do with? You’re not alone. My camera roll alone had 38,000 photos, and I’ve found myself sorting through boxes of photos left behind by my grandmother.
How do you organize thousands of photos? It’s easier than you think! How do you eat an elephant? One bite at a time. Let’s take a look at how to organize photos in easy, manageable steps.
You’ll be so glad you did. While it may seem overwhelming from afar, the process can be so satisfying. As you go, you’ll be reminded of events, people, and memories through the photos you’re organizing, a powerful source of nostalgia and a sense of belonging. At the end of the tunnel, you’ll have a system in place that makes it easier to find and access those memories moving forward.
Jump ahead
How to Organize Digital Photos
To start organizing your photos, follow these bite-size steps. Focus on one step at a time, and don’t feel like you have to do it all in one sitting. Giving yourself short, simple tasks makes it so much easier to actually get it done! Plus there are tons of tools to help with each step of the process.

Step 1: Compile Your Photos
First things first: centralize your photos. Gathering all your photos in one place makes organizing them so much easier. It prevents you from repeating steps later AND makes it easier to find photos when you need them. You always know exactly where to go because all your photos are together.
If you’re anything like me, your camera roll has thousands of photos all on its own. But don’t forget about other photos you may have scattered around. For example, I’m currently an iPhone user, but I have photos from old Android phones stored on my Google Drive.
How do you store thousands of photos? You can store all your photos in one place using iCloud or other cloud storage services, or you can get an external hard drive to store them. Explore the options to see what works best for you.
Step 2: Declutter Your Photos
With a camera in your pocket at all times, it’s easy to accumulate hundreds of photos a month. Let’s be honest. We don’t really need all those photos. On my own camera roll, I frequently end up with 10 of the same image as I try to capture the perfect shot of my kids or my pets. Decluttering your photos makes sorting them and finding the photos you want so much easier.
Blurry photos and duplicates can go, but don’t stop there. If a photo doesn’t spark a memory, if you don’t immediately recognize the people or place, or if you can’t remember why you took the photo, delete those photos too. And those endless screenshots? It’s time to let them go.
As you go, mark your favorite photos (most phones and digital storage services have a way to tag your favorite photos). This tag sets these photos apart and can automatically sort them into a Favorites folder for later.
If you’re overwhelmed by the sheer number of photos in your camera roll, there are ways to make the process faster. Most smartphones have settings that allow you to delete duplicates quickly, and apps and websites can help too:
Step 3: Create Albums
What is a good way to organize pictures? The answer is really up to you. Think about how you will search for the photos you need later. Will you be looking for specific events, people, or years? Start with the categories that make the most sense to you.
Create folders that you can sort the photos into, starting with broad categories. Then once you’ve broken your photos into more manageable categories, feel free to add subcategories that break them down even further.


Bulk Rename is a helpful tool for Windows users that allows you to rename all your photos with the date the photo was taken. Then you can sort photos by name, which also sorts them by date. Even if you’re organizing by people or events, sorting the photos by date first can make the task easier.
Step 4: Sort Your Photos

You’ve done all the prep, so it’s time to start sorting! Start with the photos you tagged as your favorites. Those are the photos that triggered a reaction, and they’ll likely be the ones you'll go looking for later.
When you’re done with that folder, take a break. Don’t try to do it all in one sitting, especially if you’re feeling overwhelmed. Going through all your photos can be satisfying as you take a trip down memory lane and review moments over the years you thought were worth capturing. Maybe you'll even find some photos you had forgotten about.
Getting burned out will make it feel more like a chore that’s difficult to get through. Set realistic goals, and take breaks as you go. Try sorting a month of photos a day until you’ve gone through all your photos, and see if the pacing feels right. If you feel like you can do more, go for it!
You can also take advantage of technology to speed up the process. Whether you’re on your phone or laptop, most devices have features that allow you to search photos for specific people using facial recognition or by events, months, or places.
Step 5: Share Your Photos
Share the photos that mean the most to you on social media or with friends and family. FamilySearch Memories allows you to share photos and the stories that go with them, or you can share access to a cloud service as well.

Another way to savor some of the memories you’ve unearthed is to print memory books or physical copies of your photos. Having a tangible photo can elicit positive emotions.
Step 6: Set Habits Moving Forward
Once you’ve tamed the beast, keep it under control. Set a reminder once a month on your calendar, and go through your recent photos. It’ll give you time to reflect on your experiences over the past month and help you maintain a clean and organized camera roll that makes it easy to access photos of your favorite memories. When you’re done, back up your photos to the cloud or to an external hard drive that you use.
How to Organize Physical Photos
You may notice that many of the steps to organize hard copies of your photos are the same as organizing digital photos. The process is generally the same, just in a different medium. The biggest difference is really the actual space you need to organize physical photos.
While you won’t be able to use some of the same apps and tools, sorting photos with your own hands can be satisfying.
Step 1: Consolidate Your Photos

First, collect all your loose photos, negatives, slides, undeveloped film, and albums. I call this the hunt-and-gather stage. Designate a space in your home as your temporary workspace, and set up a table or desk. Put 2 or 3 large storage boxes beneath the table, and start placing everything you find into those boxes.
Don’t start sorting or reminiscing while you search! If you do, you will quickly get overwhelmed. Stay focused on one task to keep your goals simple and attainable.
Step 2: Create a System
What is the most efficient way to organize hard-copy photos? First, consider how you will go looking for the photos you need later. Will you search for specific events, people, or dates? Choose a system that makes the most sense to you.
Then stage a space to organize. Set up boxes, file folders, or even vacant spots on the floor, and label them with sticky notes or index cards. If you’re anything like me, save extra space for the inevitable forgotten categories you may come across as you go. You might have categories such as birth, toddler years, childhood, weddings, first day of school, vacations, holidays, scenery, snow or beach days, family gatherings, and so on.
If you have a lot of photos to go through, it can be helpful to start with broad categories that you break down later. That way you can have manageable piles of related photos to sort through when you’re ready. For example, one section can be entitled “Family Vacations” and another “The Jones Family,” with subcategories to sort out later, such as weddings, birthdays, school days, and so on.
Step 3: Prepare a Discard Pile
Don’t forget the most important category—the discard pile. I struggle to throw things out, let alone photos that could hold sentimental value. But not every photo is going to “spark joy,” as Marie Kondo says.

Learn the ABCS photo organizers use to make it easier to part with some of the photos:
- “A” photos are important photos you’d like to digitize or place in an album.
- “B” photos are the photos that support family stories but don’t necessarily belong in the “A” pile. These are photos you can’t bring yourself to toss out, and they stay in the box.
- “C” stands for “Yes, you CAN throw out your photos.” Toss out the doubles, blurry photos, and excessive landscape photos. How many sunset photos do you really need? Make sure you have large garbage bags for all the “C” photos you are discarding.
- “S” photos are the most important of all—photos that tell a story. Sometimes even a poorly composed photo of your grandmother with a silly smile is an “S” photo because you know it represents her unique personality.
Step 4: Start Organizing
Now that you’ve gathered all your photos and prepared a space to work, it’s time to start organizing! This is the most rewarding part. As you sort, you’ll be reminded of family memories and stories.
If you recall a particularly fond memory as you’re going, write it down on a sticky note or on the back of the photo. Your memories and perspective will add to the meaning of the photos you go through. Once this process is complete, you’ll feel an overwhelming sense of gratification.
If you’re overwhelmed by the number of photos, don’t try to complete the sorting all at once. Break it up into chunks. Do one box at a time, or set a timer for yourself and then take a break. If you try to do too much at once, you’ll get burned out, and you won’t find that same joy in the process.
Helpful tip: Wear cotton or plastic gloves as you sort, especially if you’re handling aged photos. The oils in your fingers can smudge photos. Besides, it’s not very pleasant to touch dusty photos.

Step 5: Create and Share Digital Copies
Once you’ve organized your photos and discarded the excess ones, digitize the ones you saved to preserve the memories. Physical copies are often at risk.
They can fade or become damaged as they age; they might be misplaced or lost to natural disasters. Digital copies keep your photos safe and make it possible to share them with others.
Once you have digital copies, find a way to share them with other family members or friends who would enjoy them. Websites or apps such as FamilySearch Memories allow you to save photos and the stories that go with them and share them with others as well. You can also create shared drives or cloud storage.
Step 6: Maintain Your Photos
Once you’ve gotten past the first hurdle of organizing your photos, create habits to maintain your organization. This is also a great time to decide how to store your hard copies, how to restore damaged photos, or how to colorize black-and-white photos.
Related Articles
At FamilySearch, we care about connecting you with your family, and we provide fun discovery experiences and family history services for free. Why? Because we cherish families and believe that connecting generations can improve our lives now and forever. We are a nonprofit organization sponsored by The Church of Jesus Christ of Latter-day Saints. To learn more about our beliefs, click here.


